Wednesday, August 30, 2006

Tein Super Street Damper Review

Well, it's almost a week that I had the Tein Super Street Damper with Pillowball Uppermounts installed into the ER34. The specification says 16 point adjustments but when I tried it out, it has 26 clicks in front and 30 clicks at the rear. Shrugs....


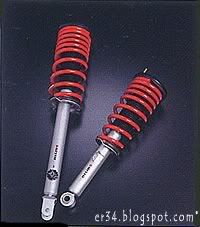
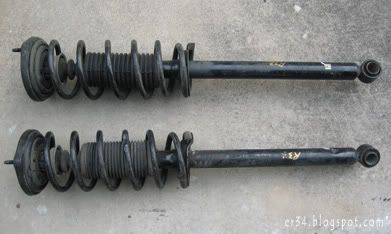
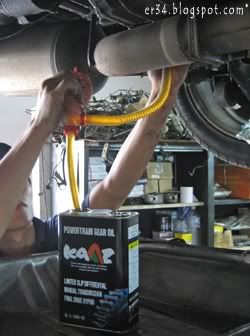
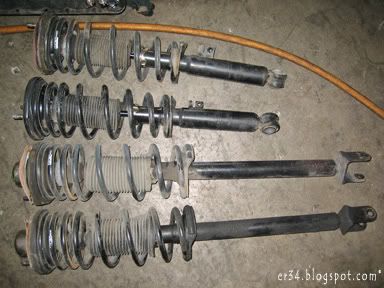
Pic 1: Stock dampers with HKS Lowering Springs

Upon removal of the stock UNISIA JECS dampers and HKS springs, it's apparent how bad the right rear damper is. It has practically leaked dry and the shaft boot had multiple torn on it due to the severe beating it had to endure. Hitting the bump stop day in day out is not too healthy you see.

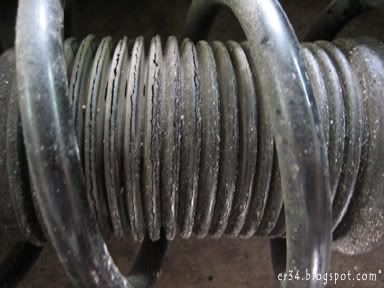
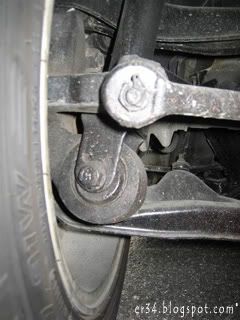
Pic 2: Torn rubber boot

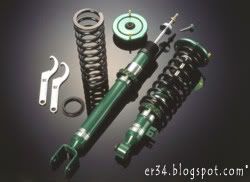
After installation of the Teins, I tried 15 clicks up front and 17 clicks at the rear. Went into KESAS highway
with it and felt quite comfy. It's probably felt slightly uprated as compare to the stock suspension.

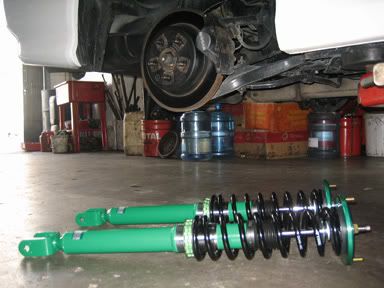
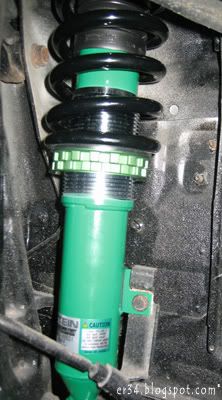
Pic 3: Teins installed in front

Pic 4: Teins installed in front

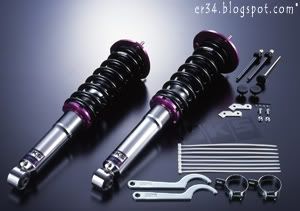
After a couple of rounds, decided to swing into a rest area of the highway and adjusted it firmer to 17 clicks in front and 20 clicks at the rear. This is probably 2/3 of the stiffest setting on the coilovers. Now this is a better setting. The ride is firm and the damping is just slightly on the stiff side. Perfect for daily driving and the occasional enthusiastic driving.

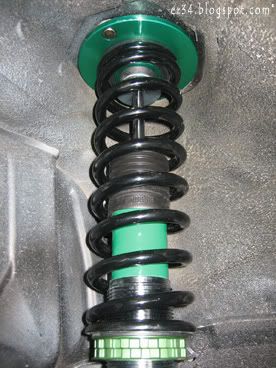
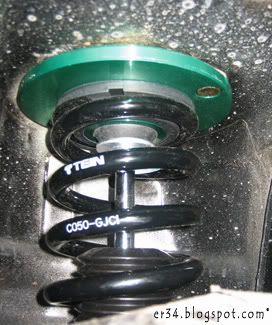
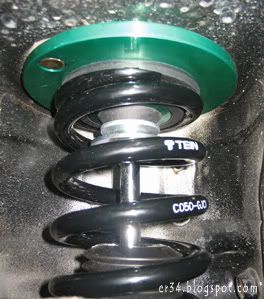
Pic 5: The rear Teins waiting to be installed.

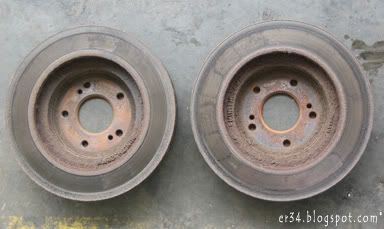
As for ride height, it's now sits just a tad bit higher than before. Those darn HKS Lowering springs it had before the Teins were really low. Scraped some sleeping policeman (speed humps/breakers) with it. This setting is just nice!

Pic 6: Teins installed at the rear

Pic 7: Teins installed at the rear

I'm beginning to grow on these set of Teins. Very appropriate for street use. No wonder it's called Super Street!!! Hehehe


Anyone wanna purchase my used HKS Springs??

Thursday, August 24, 2006

Tein Super Street Damper with Pillowball Uppermounts


Yup. Got hold of the Tein Super Street Damper with Pillowball Uppermounts. Opened out the package like a 5 year old tearing apart the wrappers of a Christmas present. :D

Pic 1: Nicely packed in a box

Pic 2: Part Number on box ID

It comes nicely packed in a box with the coilovers carefully separated inside the box via dividers. The box comes with the below:-

1) Front upper mount x2
2) Rear upper mount x2
3) Front shock absorber x2
4) Rear shock absorber x2
5) Main spring x4
6) Wrench x2 (For height adjustment)
7) Damper force adjustment tool X1
8) Rust-proofing (50ml) x1
9) Installation instruction manual x1
10) Feedback form X1
11) Novelty kit x1 (Tein stickers and emblem)

Pic 3: The contents of the box

Pic 4: Pillowball uppermounts (note rubber lining)

The good thing about getting the GSN62-B1SS3 model instead of GSN62-A1SS2 is the inclusion of the pillowball mounts. Initially I was actually looking for the one without in fear of noise intrusion into the cabin. But after learning that this model comes with a rubber ring on top of the metal mount, noise shouldn't be a problem.

The other bonus is that it is compatible with EDFC (Part No. EDK05-12120) in case I wanted to add that in the future. With the EDFC, I'll be able to adjust damping rates on the fly inside the car!

Pic 5: Front damper

Pic 6: Rear damper

The springs on both front and rear has an ID of 7.0 with spring rates of 5.0kg/mm in front and 4.0kg/mm at the rear. It'll drop the ride height to -45mm up front and -35mm at the rear.

Pic 7: Front Spring (C050-GJC1)

Pic 8: Rear Spring (D040-GIC)

I have yet to install the coilover yet but will most probably use the factory setting first to gauge how it feels like. The recommended ride height adjustment range is -65 to -24mm for the front and -55 to -17mm for the rear.

Will provide a review once I install it into the ER34.............

Can't wait for it!!! (Rubbing hands in glee.)

Wednesday, August 23, 2006

Dead Rear Damper Part 2

Well, the search continued on for the elusive ER34 stock rear dampers. I reached the point where I can't stand the darn knocking sound created from the rear dampers hitting the bump stops. Thus in the end, I decided to look for brand new replacements.

I did countless searches and obtained many quotes from the Internet to get either the below:-

Spring Rates: F6.4km/mm & R4.6kg/mm

1) Nismo G-Attack S Tune (Part No. 5300S-RSR40)

Spring Rates : F5.0kg/mm & R4.0kg/mm

2) Tein Super Street Damper with Pillowball Uppermounts (Part No. GSN62-B1SS3)
Spring Rates: 7.0kg/mm & R5.0kg/mm

3) HKS Hipermax II (Part No. 1760-SN013)

Apart from the above, I also looked at building a custom unit from Australia with Bilstein shocks and Whiteline Spings.

All the quotes were actually quite good but the cost to get it delivered to Kuala Lumpur, Malaysia is hefty due to its weight of 32 kilograms. Insurance and handling fee are manageable.

In addition, it will take at least 3 weeks to reach here from Japan/Australia and I might have to deal with taxes from Customs as well.

In the end, I narrow down my choice to the Tein Super Street Damper with Pillowball Uppermounts due to it receiving rave reviews from users around the world. Today I went shopping at the local speedshops. Went to quite a number of shops and found one that has it in stock BUT it was sold just last week. Damn!!!

After looking around somemore, it's actually quite amazing that someone else actually stock a set of the Tein Super Street Damper. Cool!! Ready stock and I can get it there and then. Screw the time consuming task of importing one in ownself. I can get it fitted in a couple of days time and be inspired to corner without worries!!

PLUS today is my Birthday and it's nice to pamper oneself with a gift, no? :P

(I'll worry about the credit card bills later. Hahahaha.....uhm.......)

Saturday, August 19, 2006

Slotted Rotors and Endless Brake Pads

If you have read my post on "ER34 goes corner carving in Cameron Highlands", you would have noted me mentioning about the front rotors on the ER34. Well, they are in dire need of some doctoring. The car judders a LOT during hard braking up to the point of me losing confidence on the effectiveness of the brakes.

Pic 1: 310mm rotors in pretty bad shape

Finally today I took the car to a workshop and got the rotors removed. I've decided to skim the rotors, get it balanced and slotted at the same time. With the rotors removed, it is apparent on how bad it is. The surface are no longer smooth and the contact patch with the brake pads are uneven. It's also a good opportunity to inspect the piston rubber seals on 4 pot calipers. So far so good. Looks like they don't need replacing. :P

Pic 2: Skimming the rotors

Pic 3: Newly skimmed rotors

After the rotors are removed, it is sent to the machine shop for skimming. Over in the machine shop, it is then meticulously measured and slotted. I had 5 slots done per side of the rotors.

Pic 4: Slotting the rotors

With 'new' rotors, the old pads need to be ditched. It comes from the factory with Hitachi pads (Part No. HP57H FF). These were replaced with Endless Vita Nuova VN9500 (Part No. EP230VN) brake pads.

Pic 5: Endless Vita Nuova VN9500

Pic 6: Part No. EP230VN

Pic 7: Endless brake pads

After everything was done and put back in place, I did a couple runs to bed in the new brake pads. After which, tried some hard braking and the juddering is gone. Woohoo!!

The whole darn process took 5 bloody hours to complete. Can't imagine how I hung around while it is being done. :O

Pic 8: Completed!!

Wednesday, August 16, 2006

Dead Rear Damper Part 1

The ER34 had a clunking sound at the rear right side since I got it. The sound only appeared when the vehicle rides over uneven roads. Initially I thought it was the tool set or the spare wheel cover. After removal of the tool set and the cover, the metallic clunking noise still persists. Hmmmmm......what could be making those noises?? It's beginning to irritate me tremendously.

Subsequent checks of the vehicle while up on a hoist revealed that the right rear damper have leaked of all its oils. Damn it. That's what making all those noises. With the lowered coil springs, the car was hitting on the bump stops day in day out.

Pic 1: ECR33 OEM rear dampers

Thank god my buddy Andrew managed to secure a set of replacement dampers. It's tough looking for an ER34 or BNR34 OEM damper thus we will have to make do with a set from a BCNR33. I got the dampers late yesterday nite. My bud delivered it to me while I was trying to get myself tipsy in the local neighbourhood pub. Hehehe.....

Anyway, when I took a good look at it the next morning. It seems A-Ok. Looks the business. While surfing later that day, I notice that the BNR33 dampers have forks at the end instead of rounded with rubber bushings. Hmmm....this is not right!

Pic 2: Stock ER34 rear damper

Pic 3: Stock ER34 rear damper have forks at the end

Better to crawl under the car for a good look. Oh darn it!! The ER34 dampers have forks on 'em which means:-
1) The set I have won't fit
2) The set I have are NOT BNR33 dampers but are ECR33 dampers!

Lucky I have not gone to the mechanic to get it changed else I'll look like a fool and would have wasted money for nothing.

Oh shucks! Now I'm back to square one. Gonna return these dampers back.......
(Wait for Part 2 where I hope I'll get it right this time)

Monday, August 14, 2006

ER34 goes corner carving in Cameron Highlands

I took the ER34 up a hill drive yesterday. Decided to head to Cameron Highlands; the perfect cool mountain hideaway with a great twisty road. Located 1,500 metres above sea level it is the highest area on the mainland Malaysia. The road up Cameron Highlands has the makings of perfect Touge (Japanese - meaning mountain pass) feel to it. Interesting? Hell yeah!

Pic 1: Outside Equatorial Hotel

I woke up early Sunday morning before the sky is lighted and took the ER34 into the North South Expressway from Kuala Lumpur heading up North to Tapah. From Tapah, exit the highway and the trek up Cameron Highlands started. Whilst on the highway decided to take the car up to it speed cut. Japanese government's agreement with car manufacturers in Japan limits the speed to 180km/h. My speedometer registered 190km/h before the speed cut comes in. Hmmm.....is it really 190km/h or the speedometer is inaccurate?? Oh well, which ever it is, I needed to rid of the darn speed cut.

Pic 2: Speed cut at 180km/h or 190km/h??

Anyway, back to Cameron Highlands, the drive up couldn't be any better. There were very little vehicles on the road and the corners were beautifully crafted out from the mountain. Lots of short straights and sharp corners! On numerous 2nd gear corners, the SLIP warning light (Traction Control) was blinking furiously. One can just feel the car braking the rear wheels individually to tuck in the car nicely. Not much drama to be found. Well of course, if TCS were to be turn off, the car will be drifting all over the place. LOL :D

Pic 3: Charging uphill. Woohoo!!!

The drive up was thoroughly enjoyable. Well of course it's not all JUST about the drive. I took time off too to visit The Lakehouse, Ye Olde Smoke House, and Bala's Chalet. All of these were magnificent Tudor styled country houses that were converted into hotels/chalets. Excellent photo taking opportunities!


Pic 4: The Lakehouse (Since 1970)

I went up all the way uphill till Kampung Raja and descended the mountain down to Simpang Pulai before heading back to Kuala Lumpur. Basically I went up the mountain on one side and down the other side. :O

Pic 5: ER34 looking down the valley

Pic 6: The twisties are beckoning......

The route down was not as enjoyable as the way up. The roads are no doubt wider but I'm not a big fan of long sweeping corners and long straights. En route down, came across a Mini Cooper S. The little car corners with little drama. Must be fun piloting it. :)

Pic 7: Lush vegetation in one of the many valleys

Unfortunately, this little drive caused me my front rotors. There were a pool of water across the road and the splash must have warped the rotors. After the incident, the car and steering vibrates like a Sybian upon mid to hard braking. Oh darn it! Now I've got to get the rotors skimmed/replaced. :(

All in, the drive clocked in 500km odd. What a day and what an experience. I'll gonna miss those corners…………

Pic 8: Time to bid farewell to Cameron Highlands

Saturday, August 12, 2006

40,000km Service - A Trip to the Doc

Today I took the ER34 to the doc. The car is has since ran 40,000km on the clock. It's in dire need of some fresh fluids and at the same time, the vital parts needs to be checked on its condition for any signs of wear and tear. Below are some accounts of what had been done.

1) Engine Oil
Out goes the old oils and in comes brand new 'blood' for the heart. I used Q8 Formula F1 10W-50 and also replaced the oil filter with the original Nissan unit (Part No. 15208-53J00)


2) Manual Transmission Oil
The shifting is starting to get ever so slightly knotty and I drained out the old tranny oils and replaced it with Q8 T55 Gear Oil SAE 80W-90. I also took the opportunity to add in some addictives in the form of Lubegard Gear Fluid Supplement.

3) Limited Slip Differential Oil
The old LSD oils were drained too and I replaced it with KAAZ Powertrain Gear Oil GL-5 / 80W-90. Funnily enough, the can bears some interesting Japanese-English; it says, "Power and speed are man's obsession. We are in ecstatic with the technology. Trust in our dreams." Yea....whatever that means. Hehehe

4) Free horsepower
Interestingly, the timing was retarded heavily at the crankshaft position sensor. This could only means it was done for compensation while running an aftermarket standalone / piggyback ECU.

Allrighty! Possibility of a FREE performance ECU! Only one way to find out. The ECU (located on the left front passenger footwell) was uncovered from the plastic trim. Darn! It's a stock unit. Perhaps it's a piggy back riding on the OEM ECU. There's still hope. The ECU was unplugged and pried open. Alas! It's bone stock!

The only explanation for the retardation was that there was indeed an aftermarket ECU running on the car previously but has since been removed and the previous owner did not re-adjust back the retardation. Damn! Short lived anticipation. Anyway, the timing was readjusted and a quick run 'round the block confirms additional power (dynoed using butt feel!). Hehehe.....

5) Zero Boost?!?
Initially, I thought boost was so low, it wasn't even registering any values on the boost meter. LOL :D Turns out that the rubber hose running into the boost sensor has came loose. A quick re-plug solves the matter and I have a functioning boost meter again! Woohoo!!!

6) ECU Check
Since I can't find anyone with the official Nissan issued CONSULT diagnostic machine with the program for the ER34, I had to make do with the Hanatech diagnostic tool. This device has the ability to read almost all types of cars! The below were checked and turns out A-Ok.

i) Engine Control System - No Error Codes
ii) Restraint System (SRS Airbag) - No Error Codes
iii) Brake System (ABS) - No Error Codes
iv) HICAS - No Error Codes
v) Electrical System - No Error Codes


Wednesday, August 09, 2006

Some preliminary pics of the ER34!

Below are some pics of the ER34 at its current state. The car were installed with some goodies as below:-

1) HKS Super Dragger cat back exhaust
2) HKS Direct Drive Super Power Flow
3) HKS Super Sequential Blow Off Valve
4) R Spec Automatic Turbo Timer
5) Firenza ST03 215/45/17 tyres
6) HKS Lowering Springs


Pic 1: Front View (God I wish I have 'em NISMO front bumpers & clear indicators)


Pic 2: Rear View (The muffler is kinda huge and the underside has seen some scraping with the tarmac)


Pic 3: Interior View


Pic 4: Engine Bay (HKS SPF Filter provides a nice induction sound & HKS SQV creates attention on shifts)

Related Posts with Thumbnails