Monday, August 20, 2007

Drive It Like You Stole It #06 - Frasiers Hill & Bukit Tinggi

Finally after an absence of 3 months, we had our next Drive It Like You Stole It (DILYSI). For DILYSI #06 we head to Bukit Tinggi. Located in the state of Pahang, Bukit Tinggi is 2,500 feet above sea level. It was a cooling 19 degrees celsius when we were there.

Funnily enough I missed the planned route of
Batu Caves - Ulu Yam - Gohtong Jaya - Karak Expressway - Bukit Tinggi - Karak Expressway - Kuala Lumpur

INSTEAD, the route taken was actually:

Batu Caves - Ulu Yam - Batang Kali - Kuala Kubu Bharu - The Gap - Frasiers Hill - Raub - Bentong - Karak Expressway - Bukit Tinggi - Karak Expressway - Kuala Lumpur

The joke was that I only have Frasiers Hill route in my mind all the time. Errrr.....sorry guys for missing the Genting Highlands turnoff and the extra long route but hell yeah it was a really really fun drive yesterday eh??

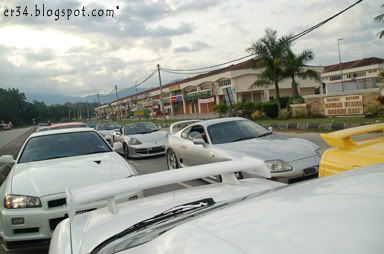
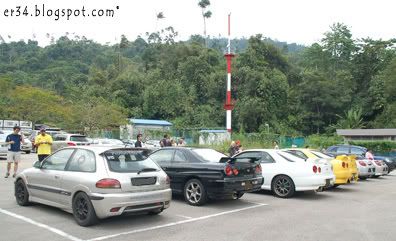
The drive this time round has the below vehicles:-

3 Nissan Skyline ER34
1 Nissan Skyline BNR34 V-Spec II
1 Nissan Silvia RPS13
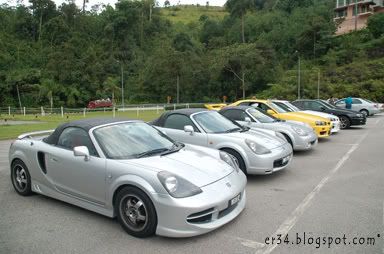
3 Toyota MRS (ZZW30)
1 Proton Satria GTi
1 Toyota Supra (MK4)
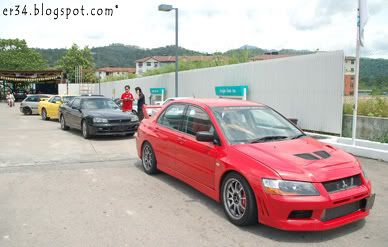
1 Mitsubishi Evolution 7 (CT9A)

Yea it's real diverse bunch of cars. From front engined front wheel driven to front engined rear wheel driven to mid engined rear wheel driven to front engined all wheel driven. All are represented here. Hahahaha :D

Pic 1: At Batang Kali waiting at the traffic lights

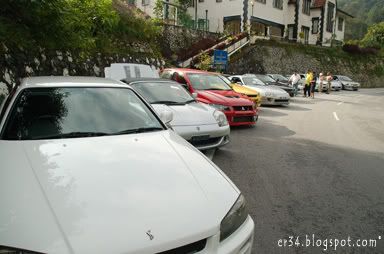
Some of the participants are first timers through these routes thus naturally the group eventually split into 2. Nevertheless, there's not much drama as all managed to remain not too far off from each other.

Some portions of the Kuala Kubu Bharu and Frasiers Hill route were kinda slippery. There were some patches that are wet, some corners with sand and lots of fallen debris on the road (leaves and small branches). One of us went sideways 90 degrees but luckily enough no harm was done. Another one got a 'lil bit of a scrape that tore away a small portion of the front bumper and dented the front fender. Nothing was wrong mechanically and thankful the driver was ok and was in full spirit too I must add.

Pic 2: Parked at The Gap

We went up to Frasiers Hill for breakfast before heading back down and towards Bentong town via Raub. It's my first time going through these roads. The route was magnificent. The twisty bit was just as fun as the road leading to The Gap. Simply marvellous. It has very minimal traffic and cool lush greenery on both sides of the road. Awesome indeed!

Pic 3: Stopped for refueling at Raub

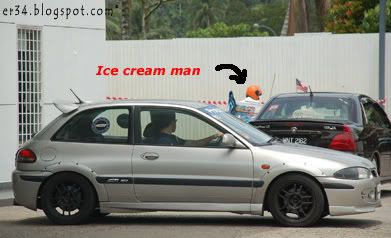
Pic 4: Mun Kit eyeing the ice cream man. Hungry for ice cream??

Upon reaching Bukit Tinggi via Karak Expressway, we stopped at the Rabbit Park for a breather. We had a pleasant surprise too as a helicopter was landing and we saw Tan Sri Dato Seri Vincent Tan alighting and went off in a Hyundai Santa Fe 2.4 GLS (SM).

All in the total distance travelled is around 220km of pure twisty roads. We set off at 7:30am and ended the drive around 2:30pm. The drive was truly enjoyable and am glad to meet a few more like minded individuals who enjoys driving as well.

Till the next drive..........


Video 1: A short video clip in Ulu Yam

Pic 5: The cars next to the helipad at Bukit Tinggi


Pic 6: The cars next to the helipad at Bukit Tinggi

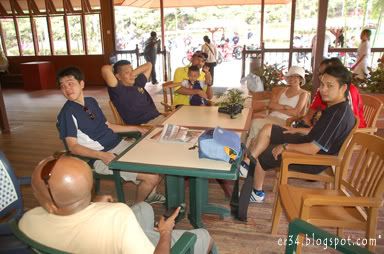
Pic 7: Catching a breather at Bukit Tinggi


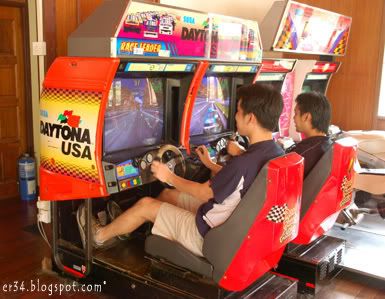
Pic 8: Real driving and virtual driving?? (At Bukit Tinggi Rabbit Park)

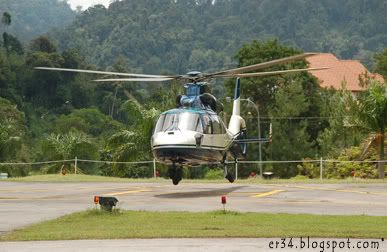
Pic 9: Helicopter landing

Friday, August 17, 2007

Wire mesh into IMPUL 534S Front Bumper

When I got the IMPUL 534S front bumper, I noticed that the side 2 openings have no wire mesh in it. It was meant and designed to be such thus I installed it as it is.

When the time has come for me to repair and repaint the major scrape I had with the bumper, I took the opportunity to add in wire mesh into the 2 openings. The wire mesh installed are actually meant for Porsche models (my paint shop guy has some lying around).

It's definitly not noticible with or without the wire mesh but now I can be assured that I won't have a pile of dried leaves stuck in there after a nice long countryside drive.
Or perhaps a dead cat or two. :P

Pic 1: Drivers side (braided lines for oil cooler visible)

Pic 2: Passenger side (feeds air into the side mounted intercooler)

Wednesday, August 15, 2007

NISMO Winker Lens (Front and Side)

Pic 1: ER34 with NISMO clear front and side winker lens

Winker Lens? What the hell is that? Well apparently in Japan, signal lights are called winker lens. Hehehehe :P

So anyway, my ER34 comes with the crappy looking factory amber winker lens. It does the job yes but I wanted a cleaner look and there is where the NISMO winker lens come in. NISMO has a smoked version and a clear version.

I changed both the front and side winker lens to the NISMO clear version. I opted for the clear version of the winker lens to blend in with my QM1 white paint job. These comes with amber light bulbs to replace the factory clear light bulbs. Yeah, it's like a colour reversal. :P

Anyway, the part numbers are as below if you decided to order for your R34.
Part No. 26130-RNR40 (Front)
Part No. 26100-RNC40 (Side)

The above were procured via two separate orders from Japan, thus the delay in me installing it. So anyway, now the ER34 looks clean and tidy instead of previously where the amber lights kinda spoils the outlook of the car a bit.

Here's some pics....
Pic 2: Stock factory amber front winker lens with clear bulbs

Pic 3: Stock factory amber side winker lens with clear bulbs

Pic 4: NISMO clear front winker lens

Pic 5: NISMO clear front winker lens with amber bulbs

Pic 6: NISMO clear side winker lens

Pic 7: NISMO clear side winker lens with amber bulbs

Monday, August 06, 2007

Retractable Number Plate Frame

Pic 1: Retractable number plate frame

I came across this retractable number plate frame while browsing among some aero parts for the ER34. This little gizmo is amazing. It's a frame for the number plate that retracts backwards as a result of wind force above 110km/h.

Well officially it's for use in the racing circuit only; to provide more air flow to the front mount intercooler but we all know what the REAL intention of this product is. If you feel all goody-goody inside, you can lock frame up so that it won't retract while using on the streets. Well if you so do wish that is....... :P

It's amazing how well engineered products from Japan are. It is made of 304 grade stainless steel to withstand corrosion and all the mounting holes are exactly as per my bumper. There is absolutely no need to modify any brackets whatsoever. Heck, even the existing holes on my number plate fit it perfectly. Just plug and play.


Now if only something similar is available for the rear number plate. Hehehehe :D

Thanks to bro Lufias to arrange the courier from Japan to me. Appreciates it. :)


This is how it looks like.

Pic 2: Mounted onto my IMPUL bumper

Pic 3: This is how it works

Pic 4: Fully retracted at speeds above 110km/h

Wednesday, August 01, 2007

Epsilon EP-60CM Speakers

Ok. I have admitted time and again that I know nuts about In-Car-Entertainment (ICE) nor am I an ICE aficionado.

Thus, I find it really weird that this is my 3rd set of speakers I'm fitting into the ER34. The first set was an Eclipse (blog entry here) and then followed by a set from Pioneer (blog entry here).

Somehow, I managed to crack the Eclipse speakers and then fitted in el-cheapo Pioneer speaker which sounds kinda crappy. And now, I'm fitting in the Epsilon EP-60CM. The box says the below (which I have no idea what it means. Hahaha)

Impedance : 4 Ohms
Frequency Response : 55Hz - 20kHz
Sensitivity : 88dB
RMS Power : 18W
Max Power : 30W

Woofer
Injection P.P. Cone
25Ø voice coil
11 oz magnet
Rubber edge

Tweeter
Silk dome
30Ø voice coil
Neodymium magnet

Here are some pictures of my new speakers, tweeters and crossovers
.

Pic 1: Epsilon EP-60CM

Pic 2: Epsilon tweeters

Pic 3: Epsilon crossovers
Related Posts with Thumbnails