Friday, June 08, 2007

Impul 534S Front Bumper

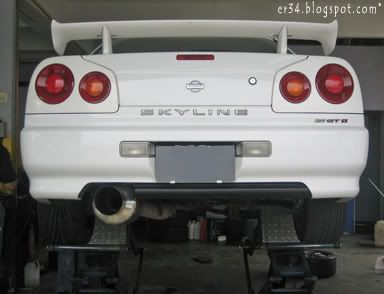
Yes I finally got rid of the B13 Sentra looking front bumper on my ER34. That piece of crappy sissy looking factory bumper has been bugging me ever since I got the car.

Initially my heart was set on the factory option Altia front bumper. I loved that bumper and everyday I curse myself for not getting an ER34 fitted with that optional bumper. However as time passes on, more and more ER34s are registered on the road with the Altia bumper making it less of an 'attraction' to me.

Exploring the options out there, I was looking at the offerings from C-West, Do-Luck, NISMO and IMPUL. My heart finally set on the IMPUL bumper for it's simplicity in design and more of a factory look albeit on the more aggressive side.


Pic 1: IMPUL 534S front bumper arrived!


Pic 2: Beyond the bubble wrap it unfolds....


Pic 3: Front view


Pic 4: Rear view


Pic 5: IMPUL logo at the back of the bumper


The IMPUL 543S bumper was procured from Japan and shipped over. All in, the cost was way more than my expectation. Damn!! I over budgeted myself.....again! :(

The bumper spend some time at my painters' place to be cemented smooth prior to painting works and fitting. Some custom brackets need to be fabricated to fit the bumper onto the body. The upper mount screw holes does not align as well as the screw holes for the under carriage plastic splash guard. Luckily the guys at my painters did an excellent job fabricating brackets after brackets to produce a factory clean look.


Pic 6: Cementing it smooth


Pic 7: Smooth as silk after my painter finished with it


Pic 8: Some of the brackets to be fabricated


Pic 9: New versus old


Pic 10: The trial fitting


I got a clearance of 5 inches with the IMPUL 534S bumper and with a long front overhang, that doesn't spell too good when going up and down parking ramps. Speed humps are not an issue at all (thus far!) but I've already scraped the bumper coming down parking ramps on the very first day it was fitted. :(

Here are some pictures of the IMPUL 534S front bumper.
So what do you think??


Pic 11: Front 3/4 view


Pic 12: Front view


Pic 13: Side view


Pic 14: Clearance issue


Pic 15: My 1st bumper scrape. Car park ramp at my house. :(

Thursday, May 31, 2007

Speedometer error with the new wheel/tyre ??

Since many people asked me about the accuracy of the speedometer after installation of the new wheels and tyres, I append the below calculation for those who are interested.

FRONT
Current wheel/tyre size : 225/45/17
New wheel/tyre size : 225/40/18

Current Radius : 317.15mm
New Radius : 318.6mm

Current circumference : 1992.71mm
New circumference : 2001.82mm

Difference in circumference : 9.11mm or 0.46%
So when the speedometer reads 100km/h , I'm actually travelling at 100.5km/h


REAR
Current wheel/tyre size : 225/45/17
New wheel/tyre size : 255/35/18

Current Radius : 317.15mm
New Radius : 317.85mm

Current circumference : 1992.71mm
New circumference : 1997.11mm

Difference in circumference : 4.4mm or 0.22%
So when the speedometer reads 100km/h, I'm actually travelling at 100.2km/h


As you can see, the difference is really minimal. Thus for those ER34 owners out there that intends to up size their wheels, you can be assured to follow the size I had on mine.

Hope this helps!! :)

Tuesday, May 29, 2007

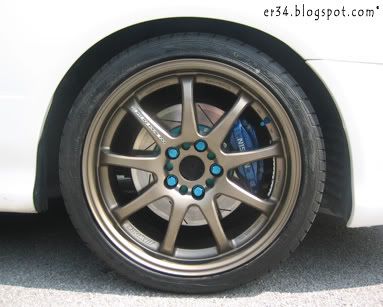
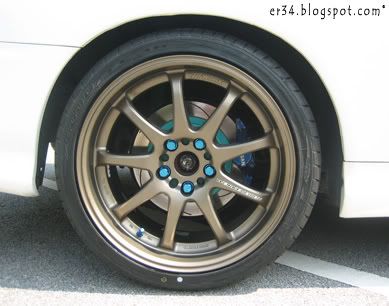
Installed: 18 inch Work Emotion XD9 and Goodyear Eagle F1 GS-D3

I finally installed my new wheels and wrapped them up with some good rubbers. I was actually shopping around for tyres as are quite undecided on what tyres should be mounted on the wheels.

I narrow down my choices to the below:-

1) Goodyear Eagle F1 GS-D3
2) Toyo Proxes T1-R
3) Yokohama Advan Sport
4) Falken Azenis ST115

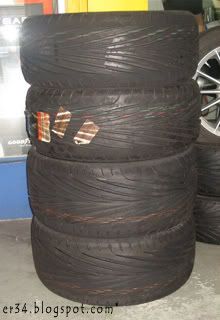
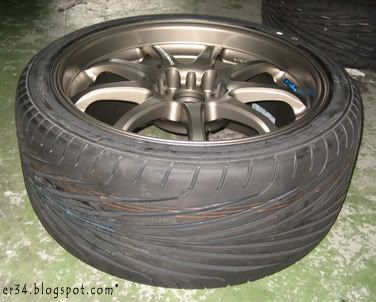
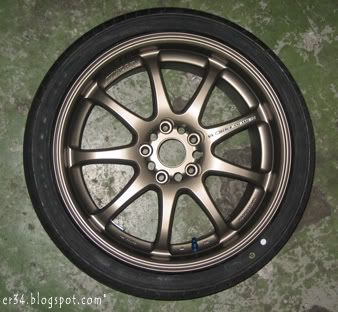
After a week plus of cross examining the pros and cons of each tyre, I decided on the Goodyear Eagle F1 GS-D3. The sizes as below:-

Front : 225/40/18
Rear : 255/35/18


Pic 1: Goodyear Eagle F1 GS-D3


Pic 2: Mounted on the Work Emotion XD9


Pic 3: Mounted on the Work Emotion XD9

The Goodyear Eagle F1 GS-D3 is a Max Performance tyres developed for driving enthusiasts. It excels in wet conditions by delivering class-leading hydroplaning resistance and traction, as well as offers competitive dry performance.

According to the review in Tirerack,

"The Eagle F1 GS-D3 tires feature Goodyear's AAtrax tread compound molded into a distinctive wet weather racing-derived OneTRED directional tread design and earns the highest "AA" Uniform Tire Quality Grade wet traction rating. The Eagle F1 GS-D3's OneTRED design combines three distinct patterns to enhance dry and wet performance. A solid and continuous center zone maintains constant road contact to enhance straight-line tracking and initial steering response. Next, sweeping intermediate power transfer bridges use "virtual rib" technology that emulates racing slicks by delivering shoulder-to-shoulder tread contact to further enhance steering response and dry road cornering traction. Then, sweeping aqua channel grooves, which are three times longer than the tire's contact patch, angle forward and out to the edges of the tread to avoid trapping water between the tire and the road enhancing wet traction and hydroplaning resistance. And finally, the virtual ribs flow into the shoulder area to form long, stable shoulder blocks that grip the road during cornering and help resist the wear associated with aggressive driving.

The tire's structure includes twin, high-tensile steel belts reinforced with spirally wound nylon that distribute the vehicle's load across the tire's footprint to provide high-speed durability and uniform ride qualities. Slightly angled body ply construction with high-ply turn ups enhance steering precision and high speed stability while exterior sidewall rim flange protectors help guard wheels from curb damage."

It's also interesting to note that the Goodyear Eagle F1 GS-D3 was amongst 11 tyres pitted in a test by
Car & Driver magazine. The end result?

Goodyear Eagle F1 GS-D3 came out top as the best tyre.

You can
download the full report (PDF - 4.4 MB) as printed in the December, 2005 issue of Car and Driver.

Hope I made the right choice!!

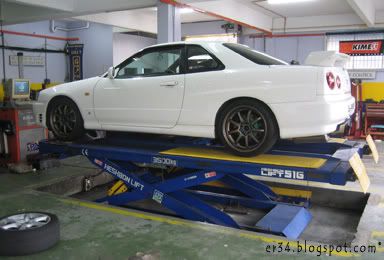
Pic 4: Fitting in the new wheels and tyres

Pic 5: Note one side with 255 and the other with 225 width tyres

Pic 6: Before new wheels and tyres

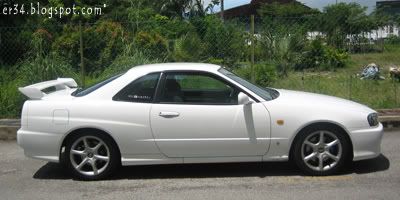
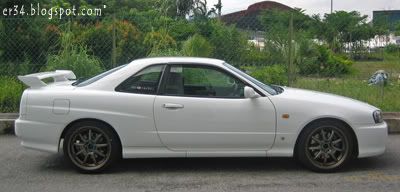
Pic 7: After new wheels and tyres

Pic 8: Side profile

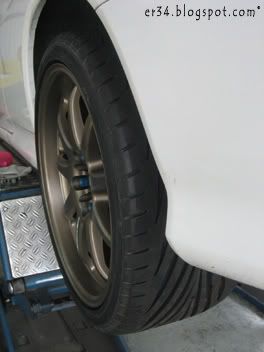
Pic 9: Front wheel

Pic 10: Rear Wheel

Monday, May 21, 2007

Drive It Like You Stole It #05- Frasiers Hill

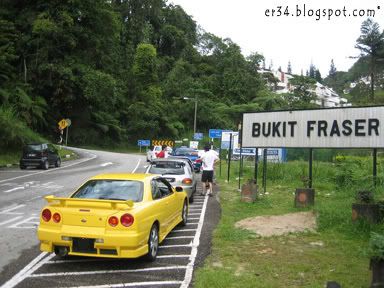
Yes, for Drive It Like You Stole It #05 (DILYSI), we went to my favourite route, Frasiers Hill!!!

The usual route is taken, i.e
Batu Caves - Ulu Yam - Kuala Kubu Baru - Batang Kali - The Gap - Frasiers Hill

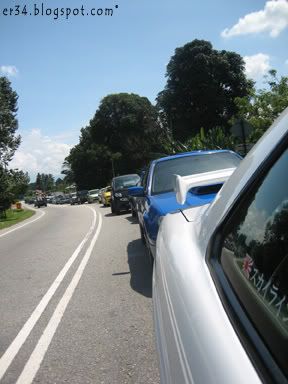
Pic 1: The group enroute to Frasiers Hill

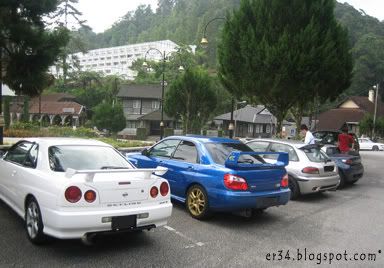
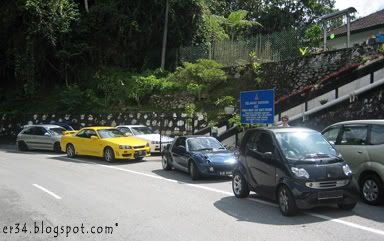
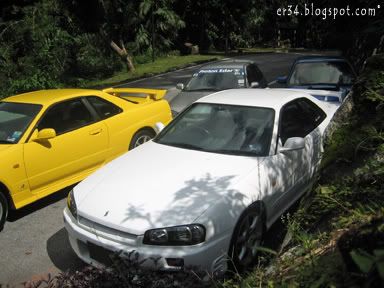
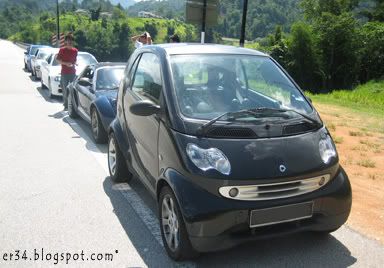
For this drive, we have 2 ER34, 2 Smart (a Roadster and a ForTwo), 1 WRX Sti Version 8 V Limited and 1 Satria GTi. It's interesting to note how the rest of the cars fare against the lighter and more nimble Smart.

While we were blasting considerable faster on Ulu Yam, Kuala Kubu Baru and on the Batang Kali road, the Smart proved it's capabilities on the twistier roads leading to The Gap and up to Frasiers Hill.

At some straighter stretch, the ER34s touched 200km/h!! That's madness on B-roads. Hahahaha......

I have to give it to the Smart; those lightweight small capacity turbocharged little midget of a car is crazy on the twisties. They can brake at the very last moment (at times no need to brake at all!) prior to charging into a tight corner. They can even stay in the middle of the road (on the dividing line) to overtake cars. :O

I even saw the ForTwo overtaking on the left via the road shoulder. Crazy dude!! Hahahaha

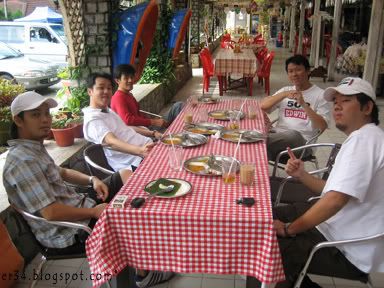
Pic 2: At Frasiers Hill

Pic 3: Time for breakfast

Upon reaching Frasiers Hill, we stopped at our regular stall for breakfast and a bit of a breather before we head back down. This 150km drive consumed quite a bit of petrol as I stayed on the higher revs most of the time. This trip took up 3/4 of my 65 litres fuel tank. Damn!!! :O

Here are some pictures of the day.....

Pic 4: The group at Frasiers Hill

Pic 5: At The Gap

Pic 6: Parked at The Gap

Pic 7: Jason ran out of water for his intercooler water spray yet again!

Pic 8: Don't mess with this Scooby

Pic 9: Waiting for the rest to regroup

Pic 10: A view of the lake

Friday, May 18, 2007

18 inch Work Emotion XD9 Wheels

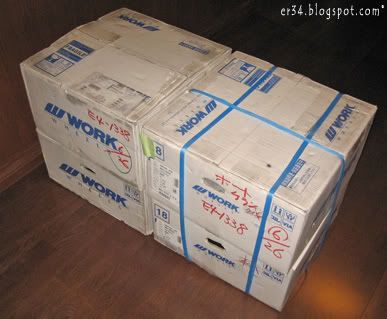
Yes!!! I got new wheels!!! I ordered a set of the Work Emotion XD9 from Japan (many people think I’m mad to order all of my parts in myself ... hahaha). It took a bloody 6 weeks to arrive from the date of booking to arrival in Malaysia via ship. Damn! That’s a long wait..... :(
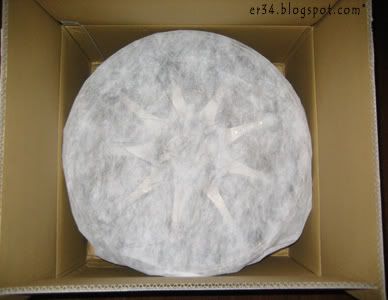
Pic 1: The Work Emotion XD9 packaging

I got the below specifications of the Work Emotion XD9:-
Front - 18×8.0JJ+35 5H-114.3
Rear - 18×9.0JJ+38 5H-114.3

Of course many know my dream wheels are the NISMO LMGT4 but with it costing twice as much for what I had purchased, that does not seem to be a possible choice. As of now, my bank account is already depleting faster than the Shinkansen's speed!

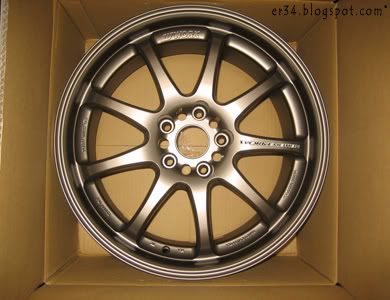
Pic 2: This is how the wheels came like in the box

Pic 3: Removed the protective cover and there's the wheels!

With the wheels, I'll be choosing a staggered wheel format; i.e. the rear will sport a bigger width. Yes I'm aftering that FR look on the ER34. :)

These wheels will be wrapped with tyres of the below sizes:-
Front - 225/40/18
Rear - 255/35/18

What tyres you ask? Well I had a few choices in mind. Will blog about that after I fitted them onto my car. So stay tuned for that ...... :P

I also took the opportunity to weigh the wheels on my trusty electronic scale. The front weighs 10.7kg each while the rear weighs 11kg each. Not exactly light but hey ... it's not a NISMO wheel ok? So can't complain too much there.

The wheels I procured is bronze in colour (Colour code: MHG). It's also available in Chrome (WMB), Metallic Grey (MGS) and white (WHT). I choose bronze because I felt it looks best on the ER34's white QM1 factory paint. Co-incidently, my previous Prodrive GC-06 wheels on my previous car is also of the same colour.

Pic 4: Work V29R2 wheel valves

I'm utterly surprised that the wheels came with the Work V29R2 wheel valves. The are anodised in a nice cool blue colour. These will set one back JPY 1,500 if I'm not mistaken. The centre cap is optional and costs JPY 3,000. I did not get the center cap though. I prefer the centre hub exposed ... it gives that racy look to the car.

Initially I was slightly dissapointed with the wheels as I thought the deep dish would have been deeper but guess I'll have to get a different offset if I had wanted that. The size and offset that I got was actually the recommended specifications for the ER34 from Work Company Ltd itself, so I guess one can't go wrong with that.

More pics below. So what do you think of the wheels???

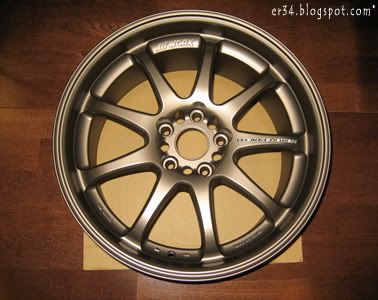
Pic 5: Work Emotion XD9 wheels

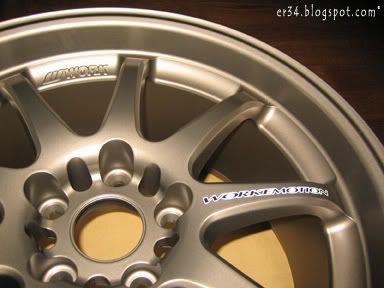
Pic 6: A closer look. Those decals are fluorescent and glows in the dark!

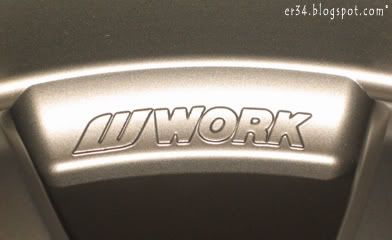
Pic 7: Embossed WORK logo

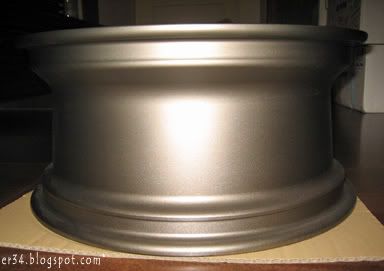
Pic 8: Fat wheels?

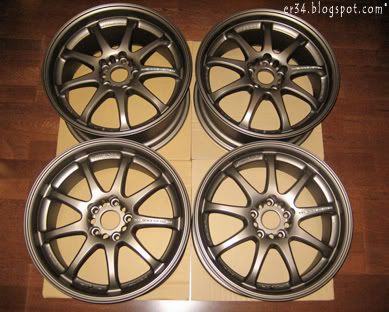
Pic 9: All 4 wheels together

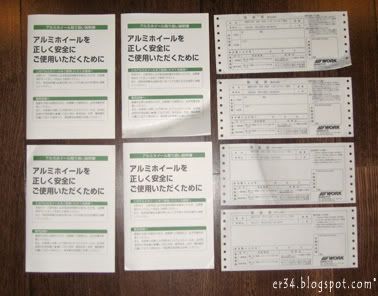
Pic 10: Warranty card and information booklet

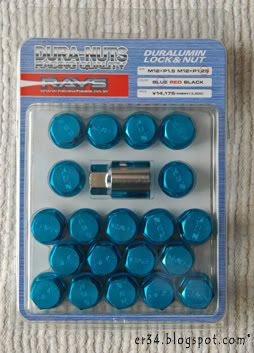
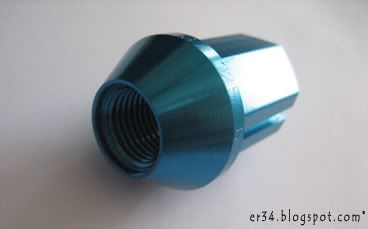
Rays Engineering lightweight Duraluminum lug nuts

Well, with my soon-to-be-installed Work Emotion XD9 wheels which leaves the lug nuts exposed, I can't be using the stock ones which looked pretty crap eh? :P

Pic 1: Rays Engineering Duraluminum lug nuts

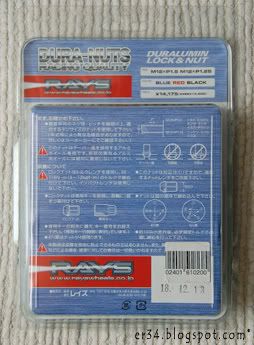
Pic 2: Rays Engineering Duraluminum lug nuts

So I got myself a set of the lightweight forged Duraluminum lug nuts from Rays Engineering. These lug nuts are extremely strong and ultra light. It's only 0.8 oz each! (about 22.6 gms).

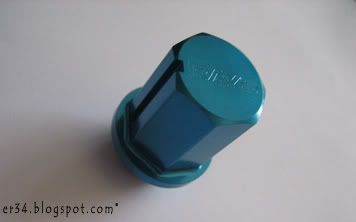
The Rays lug nuts also feature one 7-sided lug nut per wheel. These heptagonal nuts look stock from a distance, but can only be removed with the specially designed socket that comes with the set. These will act as the lock nuts to protect the wheels from theft.

The lug nuts are available in anodized red, blue, or black. I got the blue ones. Afterall, it matches the blue Work V29R2 wheel valves and my blue painted Sumitomo calipers. :P

For the ER34, ones have to ensure to get the correct specifications, which is the M12 X P1.25 thread size.

Will update when I get my wheels and lug nuts installed.

Stay tuned.......

Pic 3: Top view of the lock nut

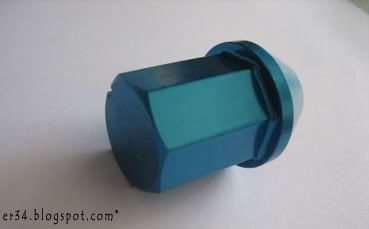
Pic 4: Front end of the lock nut

Pic 5: Rear end of the lock nut
Related Posts with Thumbnails